The first half hour was spent as usual with a cuppa and planning the morning. I know I'm getting close as before I went away I had sorted out all the parts left to go on the car and it all went into 2 x 50L boxes.
The headlights, I have opted for "black" painted backs instead of chrome ones, as the colour scheme is stainless steel and black GPR. These are simply bolted on to the headlight brackets. Lamps are secured with a metal spring clip, and the wires are threaded through the hollow bolt. As usual there is a tricky bit, this was just the retaining screw and bolt for the headlamp surround. Small and fiddly with my thick figures !

So the head lights are in position, but not tight. will wire these up along with other wiring later on in the build.

She has eyes !
Now for the dash...
Still can't make my mind up if I'm going for the "black" GPR look or the carbon fibre wrap look ?
We see how it looks when I get the instruments are in.
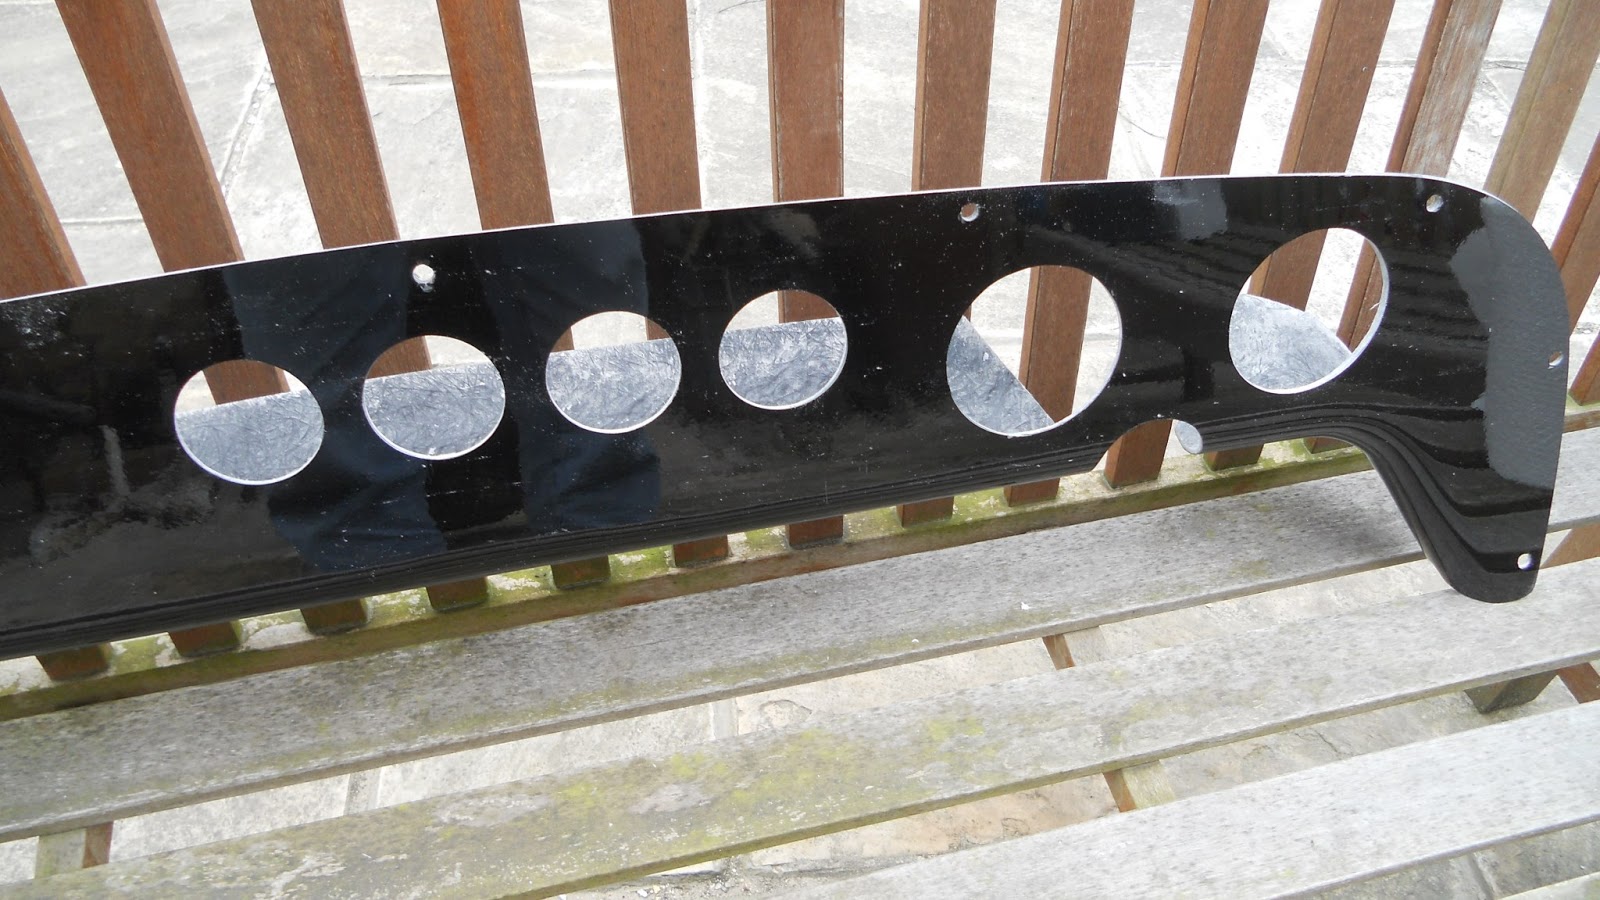
I have purchased a stainless steel instrument surround, so using this as a template I marked out the holes on the dash on a masking tape back. Also I have to cut out a small radius for the steering column, so the 2 main instruments will sit equal distances apart from the steering column.

As you can see from the photo, the radius has already been cut with my Dremel fitted with a small cutting disc. Also centres have been found for the hole saws.

The Volt, Fuel, Water, and Oil gauges are all 52mm diameter, and this size hole saw is a common size so quite cheap to buy. Where as the Rev counter and Speedo are 80mm, and that size hole saw is a small fortune, so I purchased a 79mm hole saw which was a fraction of the price, and I shall increase the size of the hole with a drum sander, its only 1mm but it will save me over £50 !
Richard from GBS recommended running the hole saws in reverse to start "scoring" the hole first as the gel coat can "break out" with a fresh saw. Then once the perimeter of the hole has been scored run the saw in the normal direction to cut through.
Recommend you do all the drilling outside, the dust goes everywhere ! but the finished dash looks good.

The stainless steel surround is laser cut at the factory and when cut it leaves a burn line on the outside from the protective film, using an old fashioned Silver cleaner this was soon removed.


You can see from the middle photo above the black burn lines close to the edge of the cut, and then after in the last photo.
I had chosen the "Smiths", "Flight" series of instruments, they have a modern but classic look about them.


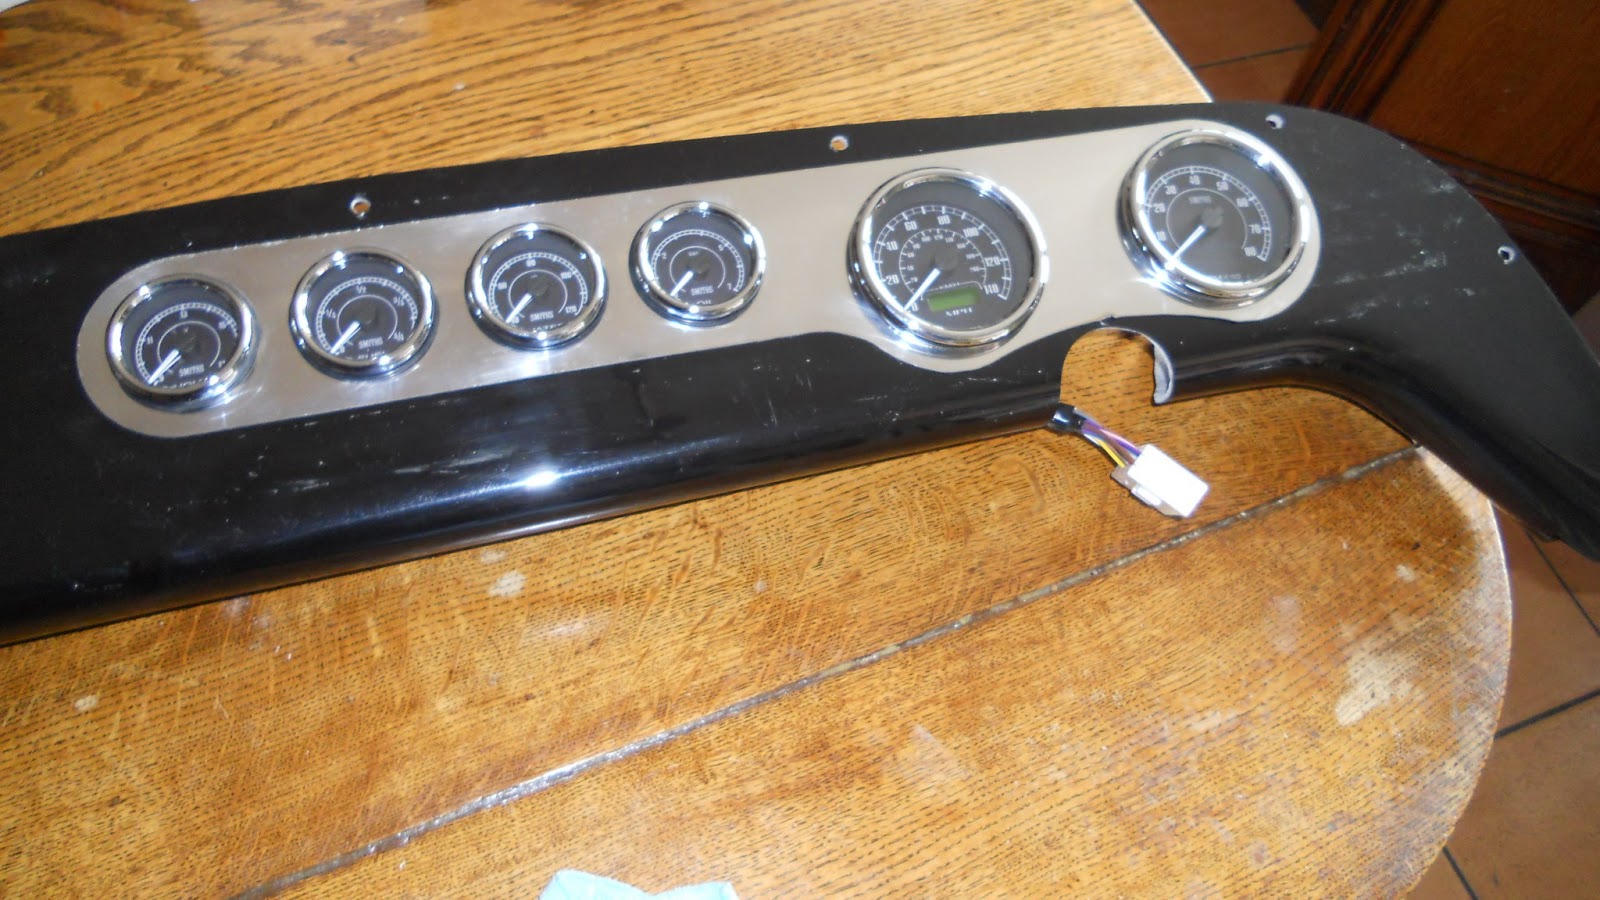
All instruments now fitted...
So should I leave it in black GPR or cover it in a carbon fibre wrap ? leave a comment ?
Note :- The Centre console and transmission tunnel will have carbon fibre wrap
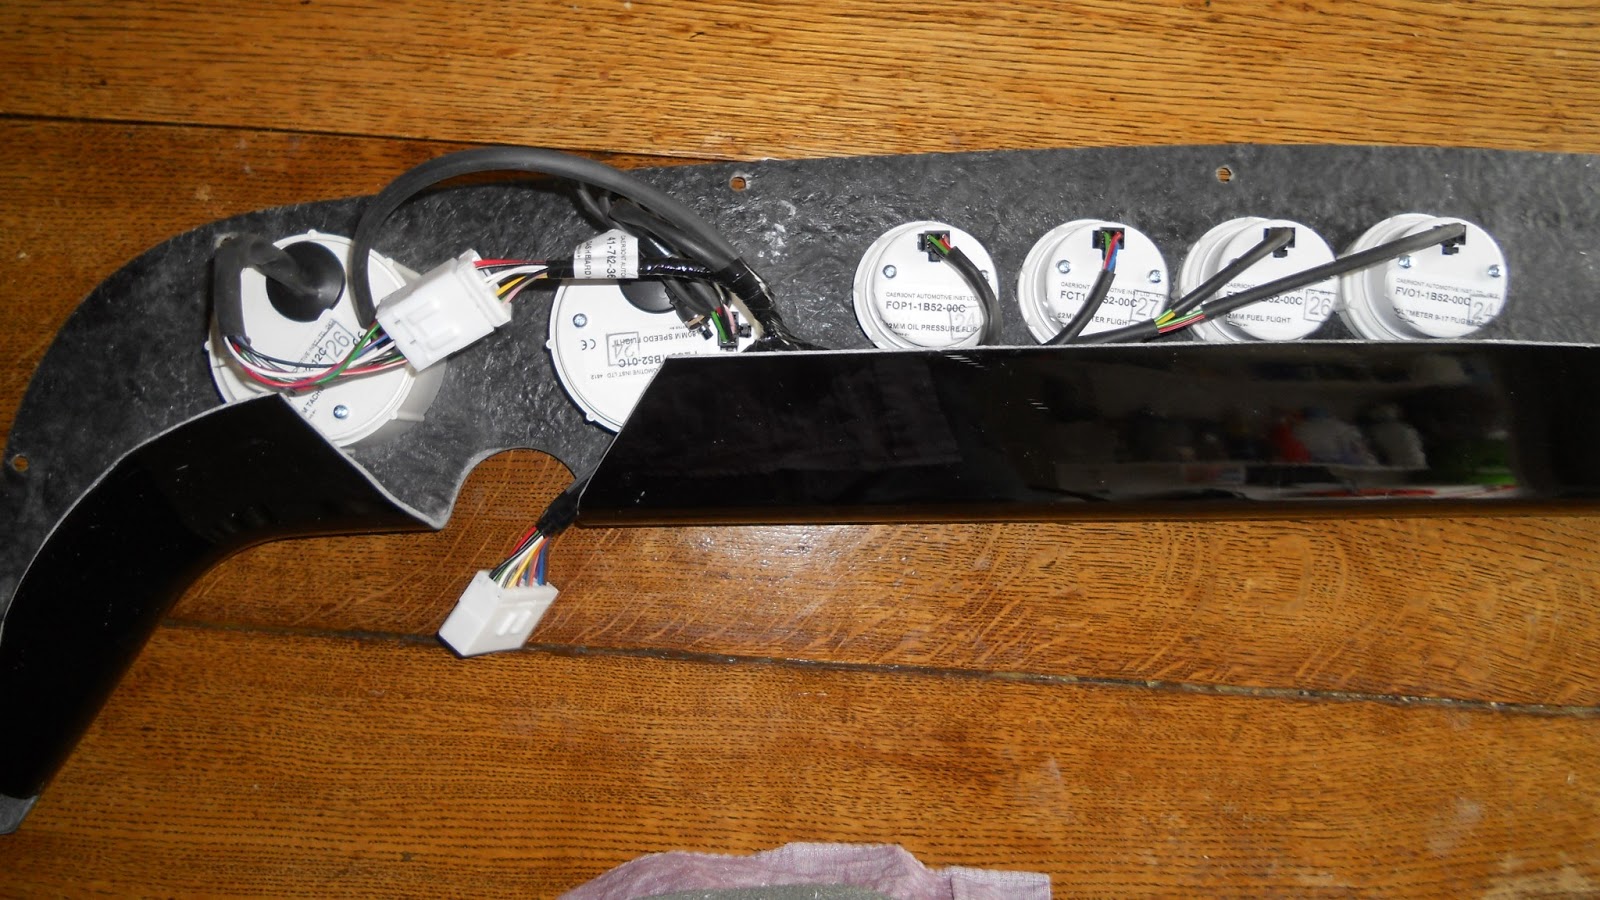
Finally wired up the rear with the dash part of the Loom.
4 Hours work today.
Total build time... 143 hours
No comments:
Post a Comment